Last month’s column introduced ImageMagick (IM), a command-line tool that’s adept at converting images from one format to another. (In fact, that’s why its main program is named convert.) But IM is well-suited to other image manipulation tasks, too. You saw some of those additional capabilities last month. This month, let’s dig in and discover even more.
File Formats Revisited
Last month’s “Power Tools” looked at the differences between the PNG, JPEG, GIF, and TIFF image file formats. If you’re planning to spend a considerable amount of time working with images and want high quality, there’s a lot to know. Anthony Thyssen’s Web page, “Common Image File Formats” (http://www.cit.gu.edu.au/~anthony/graphics/imagick6/formats/) is an excellent place to start. The page discusses formats and how IM handles them.
Most image file formats store more than pixels (or vectors). For instance, your digital camera likely stores a lot of EXIF data along with the image. This data can include the date and time you took the photo, camera settings, and more.
When you edit an image, this metadata may or may not be preserved. An image editing program might also preserve data that becomes misleading — for instance, by not revising the “image generated” date to the time you converted the image.
You can see an image’s metadata with IM’s identify utility. This is handy not only for reference; you can also use the metadata in scripts that handle images. Indeed, the data has a lot of uses. As a simple example, IM can read the date and time that a photo was taken, then write that as text on top of the image. This way, everyone can tell when the photo was taken. (You can keep an original, unannotated image for printing.)
identify tells more about an image than just EXIF data. It tells you the current file size in bytes. Its -verbose option gives yet more info, including a textual version of the image histogram (if there are less than 1,024 colors, that is). The -format option lets you choose the data you want. Listing One has an example.
$ identify image.jpg
image.jpg JPEG 640x512 640x512+0+0 DirectClass 5e+01kb
$ identify -verbose image.jpg
Image: image.jpg
.
Colors: 73781
Resolution: 2900x2900
Units: PixelsPerInch
Compression: JPEG
Quality: 75
Comment: Copyright (c) 2005 by Jerry Peek, jpeek@jpeek.com
.
$ identify -format "%i -- %c" image.jpg
image.jpg -- Copyright (c) 2005 by Jerry Peek, jpeek@jpeek.com
Notice the comment. This is one place you can add information to the image, say, to record where you took the photo and how to contact you.
Use convert -comment to add or change the comment. You can embed other image attributes in the comment, if you’d like, by using the format characters listed in the IM documentation for the -format option. Of course, you can also use shell command substitution to include the output of other utilities. See Listing Two.
$ convert -comment \
"Copyright `date +%Y` by Joe Smith. Master is in %d on `hostname`." \
~/img/123.png ~/img/123_final.jpg
$ identify -format "%c" ~/img/123_final.jpg
Copyright 2006 by Joe Smith. Master is in /home/joe/img on foo.edu.
date interprets its %Y format immediately, so the shell passes only the %d format string to identify.
Adding a comment to an original JPEG file has a side-effect: adding the annotation re-encodes the image, reducing its quality somewhat. As mentioned last month, “lossiness” is inherent in the JPEG format, so it’s best to keep images in another format until you make a final JPEG, or at least to do all of your IM editing in a single pass. convert can do multiple operations in one pass. (The jpegtran utility — which isn’t part of ImageMagick — can do some JPEG operations losslessly. However, it only works under certain conditions. You can find jpegtran and its documentation at http://www.ijg.org/.)
Hiding Image Data
Image metadata can be handy for you, but it also can be a privacy problem if you post your images online. For instance, your boss might see where you really were on June 15th, or a thief might find that you have a high-end Nikon SLR with an expensive lens (your camera may put its model number and lens type into the EXIF data). This can happen on a photo site like Flickr that makes it easy to see EXIF data. But it’s also true if you post the plain images somewhere else; someone can download them and read the EXIF info.
The convert option -strip strips any profiles or comments from the image. Happily, this doesn’t remove information that’s inherent in the image, like the JPEG quality. (After stripping the image, identify -verbose will still show you lots of information.)
An esoteric IM operator is composite -stegano. It uses steganography to hide a “watermark” image at a certain place within another image. Later, if you want to know whether a particular image is identical, display stegano: recovers and shows the hidden image. (Steganography can also be used to hide a “secret message” text image or any image within another innocuous-looking image.)
Steganography might sound like a good way to see whether someone has copied one of your images, but any manipulation of the“ steganographed” image, such as resizing, can destroy the watermark. Adding the watermark may also cut the image quality. And extracting it can take plenty of CPU time.
Figure One shows the process of hiding a small logo file, 240 pixels wide by 36 high, in a 640x480-pixel JPEG file. The image logo.png is hidden in a new file named out.png at a location beginning 44 pixels from the start of the image image.jpg:
$ composite -stegano 44 logo.png image.jpg out.png
$ identify out.png
out.png PNG 640x480 DirectClass 768kb 0.060u 0:01
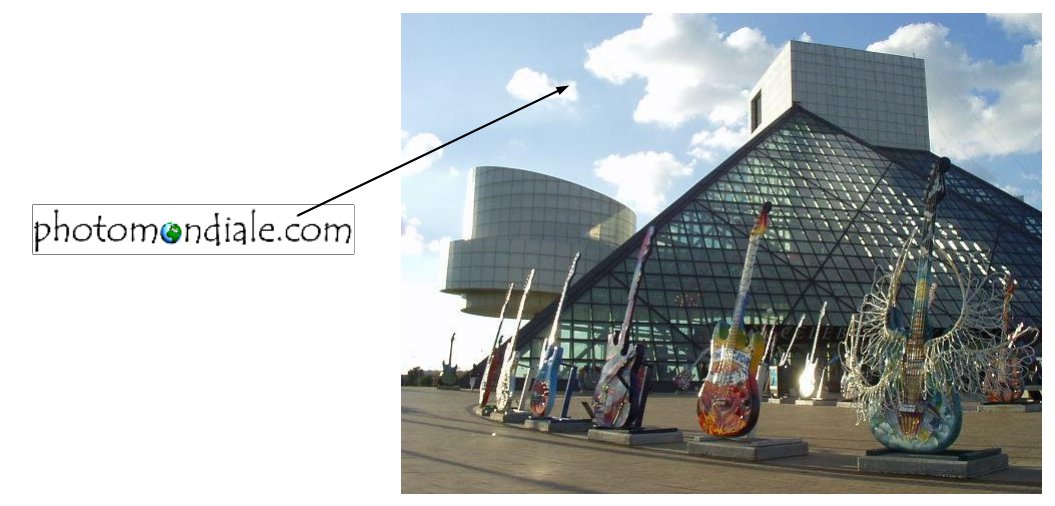
Now we have a 640x480-pixel PNG image, out.png, that looks identical to the input file, image.png — even when magnified.
To see the hidden image, pass the logo dimensions and its starting point as width x height x start to the IM display utility. Precede the filename with stegano:, like this:
$ display -size 240x36+44 stegano:out.png

Figure Two shows the process. Instead of viewing the hidden logo, you can extract it to a file named hidden.png with a command like convert -size 240x36+44 stegano:out.png hidden.png.
Resizing Images
If you’ve ever looked at a magazine or newspaper photo with a magnifier, you know that the image is made of dots arranged in a grid pattern. If you try to enlarge the image on a photocopier, or some other way, you won’t get you more detail. It simply spreads those same dots. The image gets bigger, but it also gets fuzzier.
Digital images (raster-format images, that is) are about the same. Once you’ve stored the original pixels, they’re all you have. Enlarging the image means either showing it at a lower resolution (spreading those same pixels over a greater distance), or making the same or higher resolution by calculating new pixels to fill the gaps between the original (now spread-apart) pixels.
Neither of those typically make an image that looks every bit as good as the original. (Shrinking an image is easier to do smoothly.)
There are many algorithms for resizing images. Each calculates what pixels should be shown, at each spot in the grid, to make an image that looks acceptable. ImageMagick comes with fifteen different resizing filters. You can choose one by giving its name with the -filter operator before the -resize operator. Not all filters work with all image formats, though. For instance, the “Mitchell” filter works with with images that support a palette. If you don’t specify a filter, IM picks one.
As you resize, you’ll probably want to preserve an image’s aspect ratio, its ratio of width to height. Otherwise, objects in the image change shape: circles become ovals, and people can look taller or wider.
By default, when you give a new image size to IM, such as convert foo.jpg -resize 640x480, that width and height are treated as maximum values; IM preserves the aspect ratio and get as close to that size as possible. Appending a ! flag, as in -resize 640x480!, tells IM to make exactly that size — even if it changes the aspect ratio. (The documentation explains more resizing flags: <, >, @, and %.)
Let’s look at the various filters in the next section.
Montage and More
This section is a grab-bag of IM techniques to create images, use filters to enlarge them, and arrange the resulting fifteen images in a montage pattern. You can use the same technique to arrange photos, or thumbnails, for display in a single larger image.
First, let’s make a box with four 2x2-pixel colored squares. The IM parenthesis operators (escape them so your shell won’t interpret them) let you make an image “on the side” that’s handled separately from the rest of the image sequence. The command in Listing Three makes a row in each set of parentheses, using the +append operator shown last month. The command then joins the two rows with a final -append operator, which joins images vertically, and saves the result to the file sq.png. The end result is shown in Figure Three.
$ convert -size 2x2 \
>  \( xc:red xc:green +append \) \
>  \( xc:blue xc:white +append \) \
>  -append sq.png

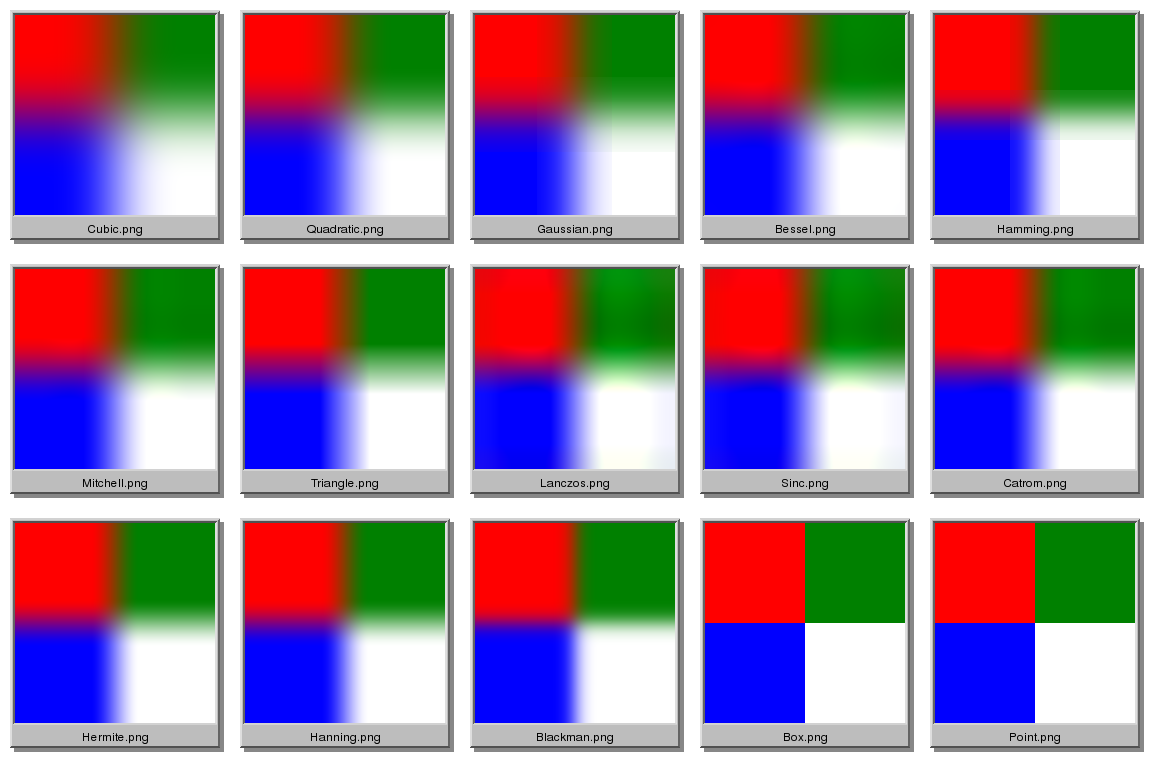
Next, let’s resize the small box greatly, using each filter once. (This example was adapted from Anthony Thyssen’s.) Listing Four shows the setup. The filter names are stored in a bash array. A for loop enlarges sq.png from 4x4 pixels to 200x200, using each filter, creating output files named for each filter.
Here, the filters are ordered from “blurriest” to “sharpest,” though that’s not a very exact description. Notice that some filters, like Hamming and Triangle, make straight edges; others vary the intensity of a color. When you have an important resizing job to do, comparisons like this can help you pick the best filter for a particular image.
After creating the fifteen enlarged images, the bash parameter expansion operator ${ parameter / pattern / string} tacks .png onto the end of each filter name; those names are passed onto the IM montage utility.
The montage options let you control whether each image has a label, a frame, how many are in the grid, and more. Here, a label containing the filename is added under each image, making a 5-pixel frame, putting 5 images in each row, and adding a drop shadow. The -geometry option tells montage to add 10 pixels of border space around each image; specifying a border this way also tells montage to show the images at full-size instead of shrinking them.
As with other IM utilities, montage -help gives a list of options; there’s more help in the HTML documentation files installed with IM.
$ filters=( Cubic Quadratic Gaussian Bessel \
> Hamming Mitchell Triangle Lanczos Sinc \
> Catrom Hermite Hanning Blackman Box Point )
$ for filter in ${filters[*]}
> do convert sq.png -filter $filter \
-resize 200x200 $filter.png
> done
$ montage -label '%f' -frame 5 -tile 5 \
-shadow -geometry +10+10
${filters[*]/%/.png} examples.png
The shadows are semi-transparent, so the result should be saved in a file format that supports partial transparency. Again, PNG is a good choice. Figure Four shows the result.
Coming Next Month
Next month’s “Power Tools” will use IM tools to view the image data as a three-channel histogram to see if it’s well-exposed, use IM tools to improve image, and more.
Jerry Peek is a freelance writer and instructor who has used Unix and Linux for 25 years. He’s happy to hear from readers; see https://www.jpeek.com/contact.html.